Simple data sample and store to USB with the SDM3000 series of DMMs
March 7, 2018
In some applications, it can be helpful to collect data for a period of time and then analyze the data using a spreadsheet program like Microsoft Excel©.
In this operating tip, we are going to show you step-by-step instructions on setting up a SIGLENT SDM3000 series DMM (SDM3045X, SDM3055, or SDM3065X) to save a set number of samples to an external USB memory device and then plot it using Excel©.
Setup:
Configure the meter for the measurement of interest.
- In this example, we want to measure DCV
2. 20 V fixed range
3. Set the measurement aperture to 1 PLC. This is sometimes referred to as the NPLC or measurement integration time.. higher values for NPLC = slower but more accurate measurements.
1 NPLC is 1 Power Line Cycle.. or 1/60 Hz here in North America.
NOTE: You can also disable AutoZero to measure faster, but this disables the AutoZero reference measurement for each sample. Over time (and varying temperature), the readings will drift and increase inaccuracies.
4. Connect the inputs of the DMM to the signal source that you wish to measure

Prepare to Scan:
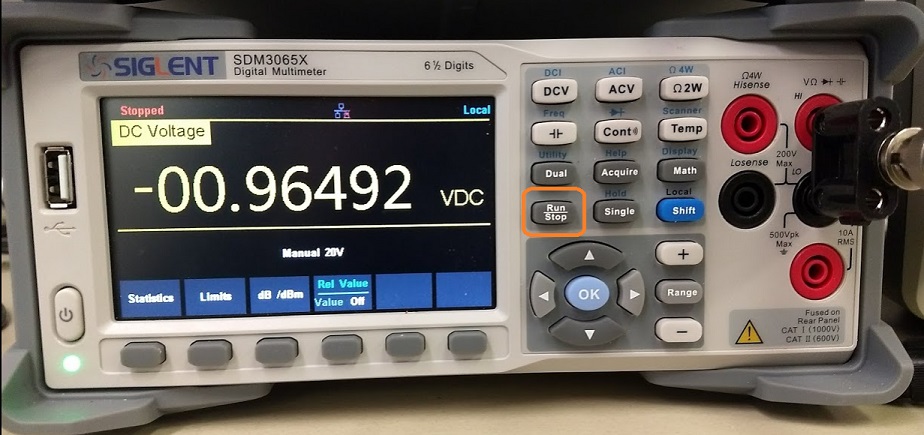
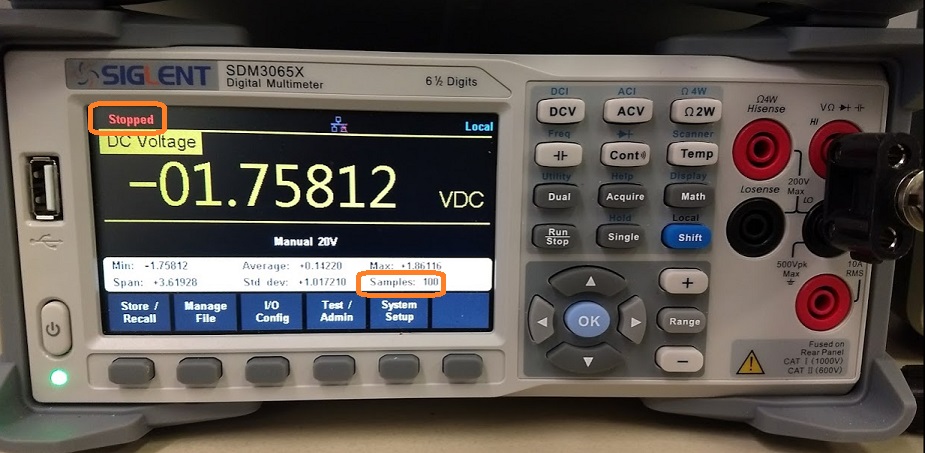
- Press Run/Stop to stop data collection. This is indicated by a red “Stopped” indication on the display.
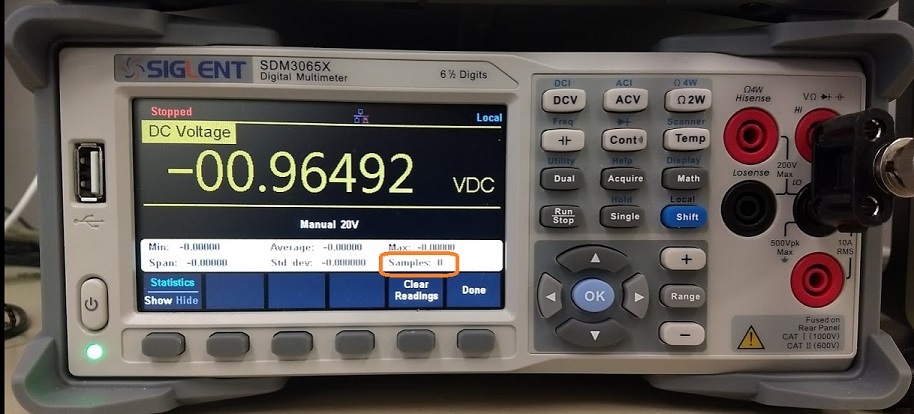
2. Clear the memory buffer by pressing Math > Statistics > Clear Readings (The number of stored samples is shown next to the Samples label)


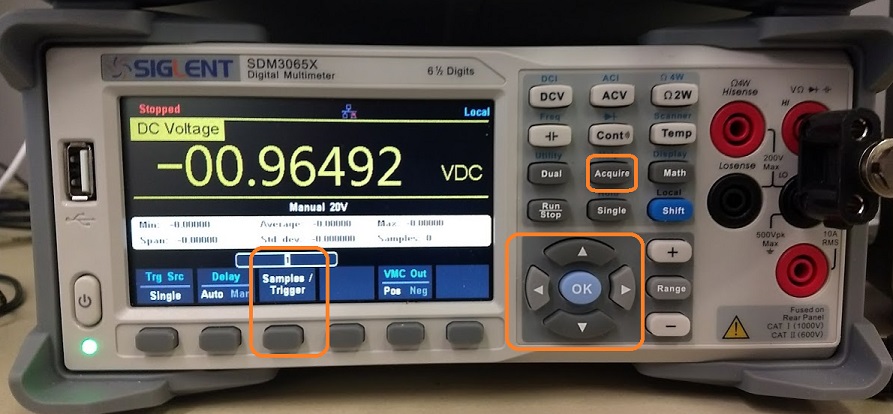
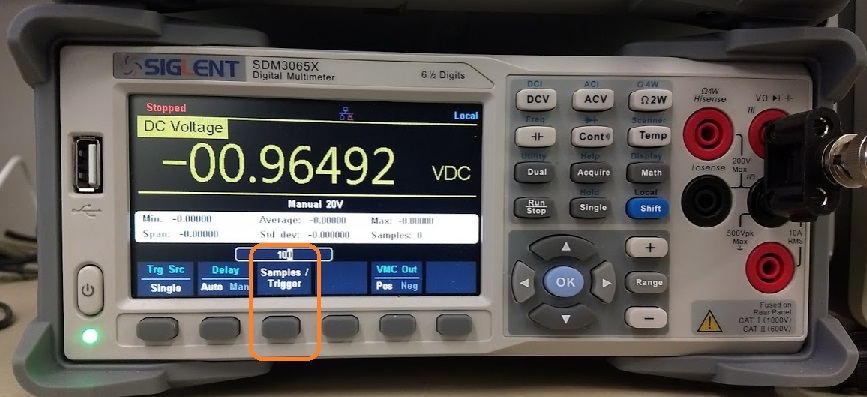
3. Press Acquire and set the sample/trigger to the desired number. In this example, we are going to set the sample count to 100 using the Up/Down/Left/Right keypad. NOTE: Left adds decimal places, right subtracts. Up adds digits and down subtracts them.
4. Press the “Single” button to start the acquisition. When the meter is collecting data, there will be a flashing green dot and the word “trig” on the display. The sample count will also increment as each measurement is completed.
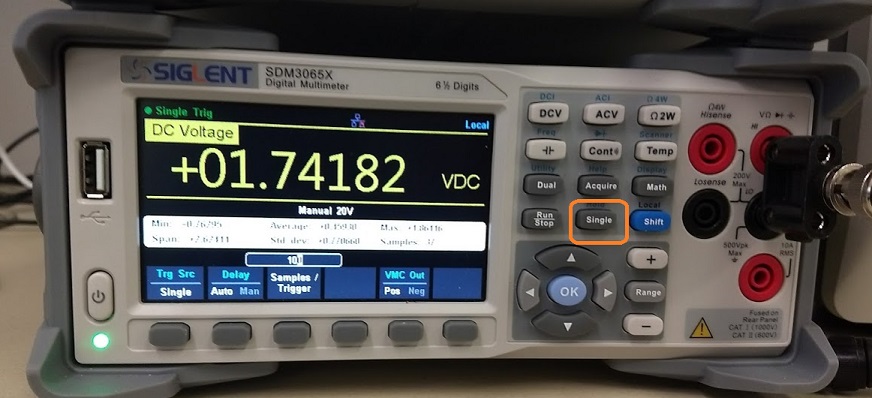
5. Wait for data buffer to fill (STOP on the DMM display is displayed and the sample number should equal to the setpoint in step 3)
6. You can insert a USB stick (FAT32 format) into the front panel USB port and wait for the device to be recognized now or at any point from now till the actual data save step.
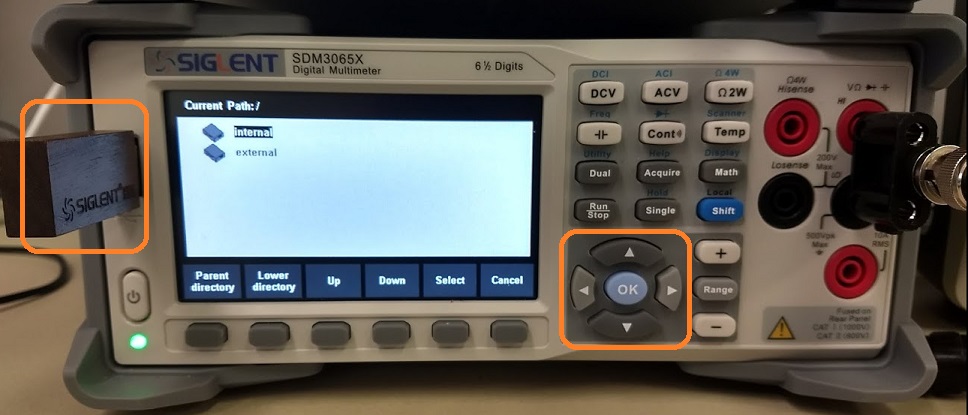
7. Open up the storage menu by pressing Shift > Utility > Store/Recall
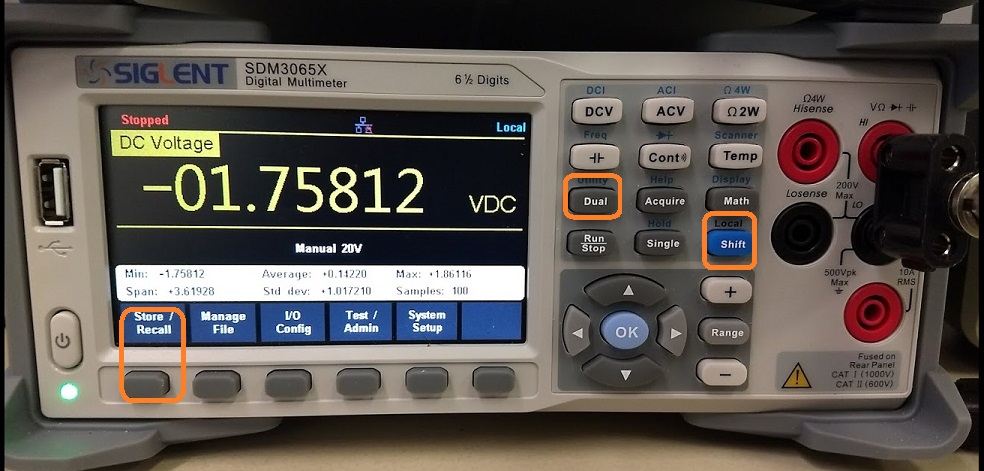
8. Press Store Settings

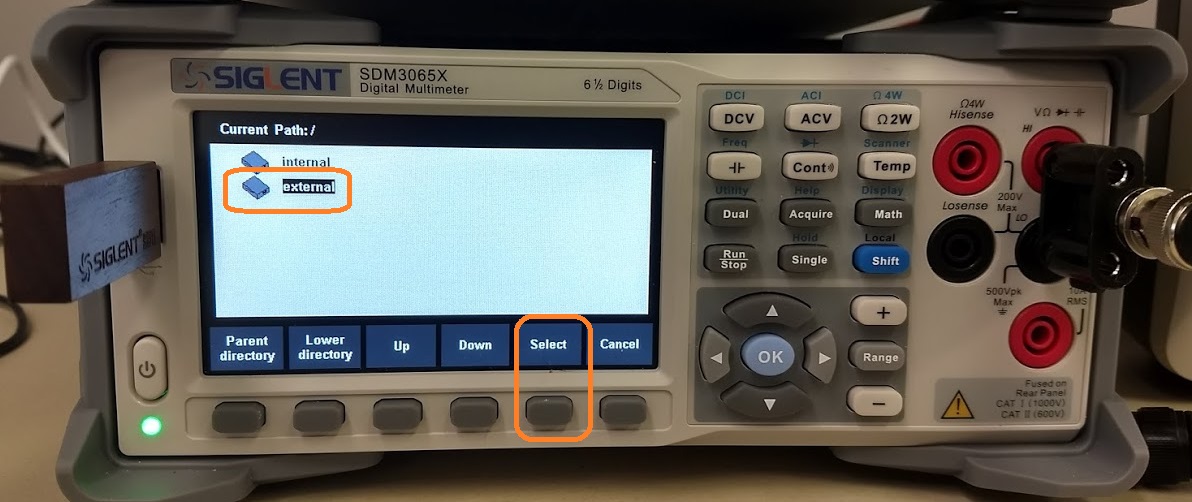
9 Set current Path to External by pressing Browse and use the Up/Down range arrows to highlight ‘external’ and press select. External will only appear when a USB memory stick (FAT32 format) is inserted into the front panel USB slot.
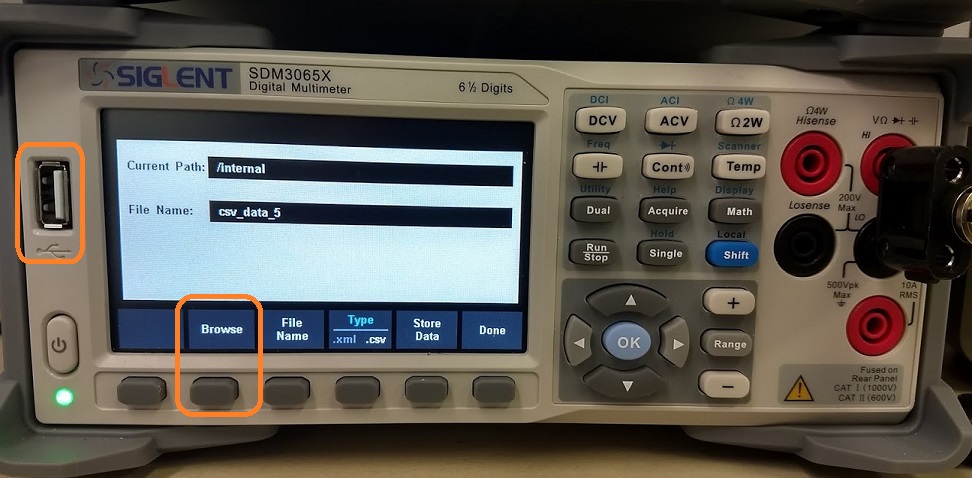
10. Set type as CSV (.CSV is comma separated variables for use with spreadsheet programs)
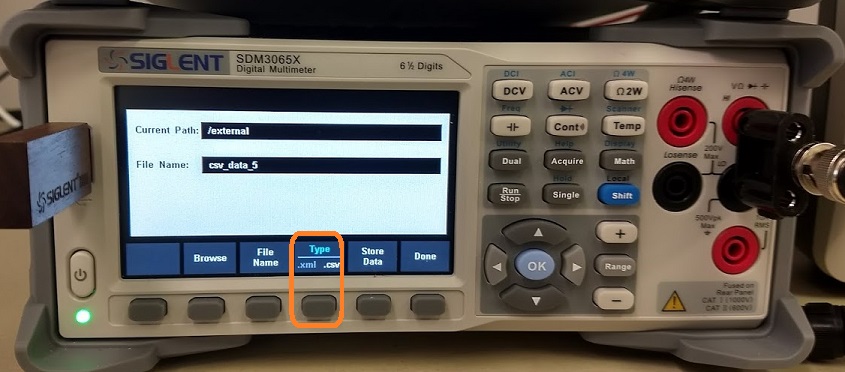
11. Rename file, if required by pressing File Name and using the keypad/Up/Down/Left/Right arrows to select values
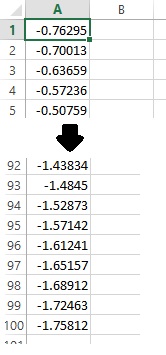
12. Remove the USB stick and open in a spreadsheet program. Here, you can see all of the voltages stored on the memory stick.
NOTE: The data does not currently store timestamp information. The time duration between samples is going to be fairly stable and consistent, but there may be variations. You can estimate the sample interval by dividing the total test time by the number of points collected and then manually enter the calculated timestamps for each point.